Seeing as there seems to be a few questions on installing aftermarket kit on a MOST system, here's what I did to install a Becker Cascade.
Usual disclaimers apply, this is not a guide, only a description of how I got round the issue. I'm not an audio installer, copy at your own risk, etc....
I wanted this to be reversible so that if I ever sell the car in the future I can return to standard if need be. For that reason I avoided cutting into existing wiring and just jumpered or used new wires where needed.
I had a quite a few more photos than this but my phone threw a wobbly and lost them before I managed to transfer them to my laptop.
I'll get a few dash pics in the morning and update the thread with them as I fitted a GT3 console delete kit to tidy it up a bit.
Must add that I had a few email conversations with Tino who had also been through this and cleared up a few of my questions.
This is some of what I removed from the car. It's a bit more than most as I removed the Nokia phone holder and also an aftermarket (non-touchscreen) Nav unit that was installed in the lower console and had a DVD unit in the front of the car.
My car was non-PCM so I then removed the head unit, CD changer and Bose amp. The orange cables for the fibre optic link are now redundant.
The factory head unit connector fits Becker anyway so no need for an adaptor but you do need to add a switched 12V feed from the fusebox as there doesn't seem to be anything nearby. Any audio installer should have mini-ISO pins and sockets for this.
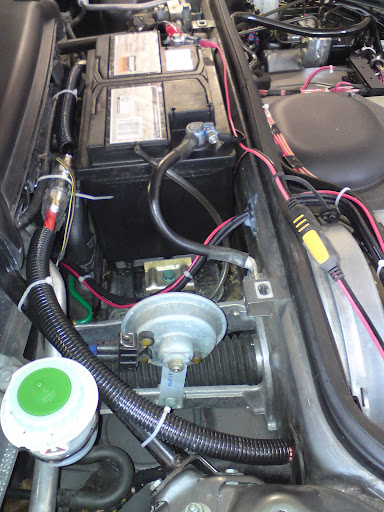
I ran decent quality speaker outputs from the head unit through the bulkhead to go to my new amp (Alpine PDX-5). I also ran the 12V wake-up feed wire.
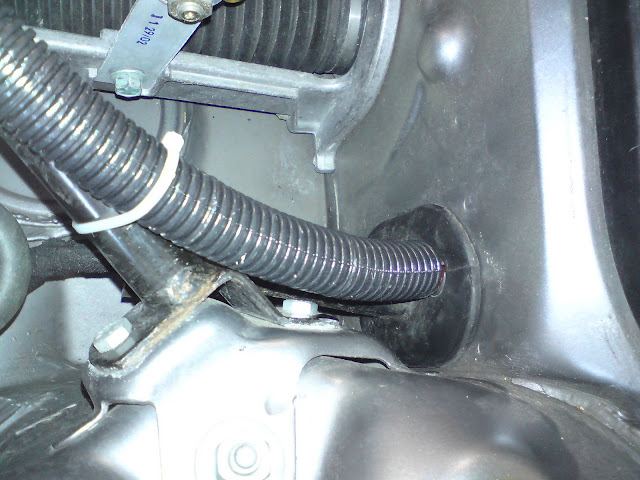
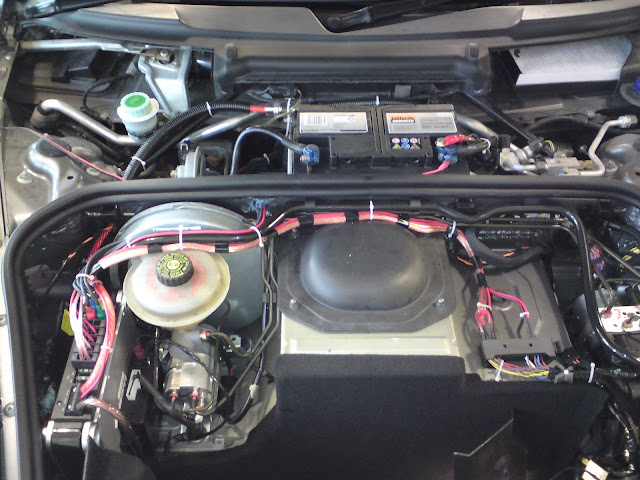
There's a large grommet in the bulkhead that can be accessed from the drivers footwell and comes out behind the battery at the bottom drivers side. You can also see the fuse holder I used for the 12V feed from the battery.
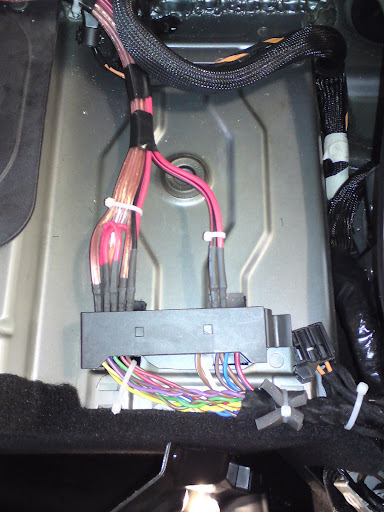
Now, you'll see that my 12V wake-up feed runs alongside my RCA cables. I have a slight hum which I can notice but nobody else seems to hear. I know it's there though so I'm going to try and find an alternative route for the 12V feed.
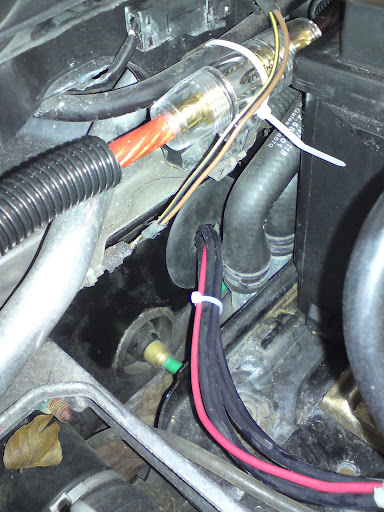
I already had a pre-drilled hole through the second bulkhead for the previous Nav system so I re-used that for the RCA cables and added some new grommets. I took my battery 12V feed through a seperate, larger, grommet which you can see in the photo below.
And a closer view of the battery feed.
I fit the new amp where the CD changer was located and re-used the CDC mounting bracket also by just bending one side straight to accomodate the Amp.
I didn't want to cut into the existing speaker wires so I used some connectors I had in the garage (they're for IP67 connectors I believe, found at places like RS Components or various car electrical suppliers).
With these I just plugged straight into the output connector from the Bose amp and put heatshrink over each one to avoid any shorting. I jumpered the FL dash and FL door together to make it 4 ohm and done the same for FR. The rears are already 4 ohm.
I didn't use the sub as I removed it to make extra load space for my sons travel cot but you can remove the sub and rewire the speakers inside to be in series which should change it from a 0.5 ohm speaker to a 1 ohm speaker. The PDX-5 should be able to handle that I would imagine.
Finally plugged everything in to the amp, connected up the Head Unit and it works!!!
And with the covers back on although I had to make a little bit of modification to the CDC cover with my Dremel just to get enough space for the wiring to be routed properly.
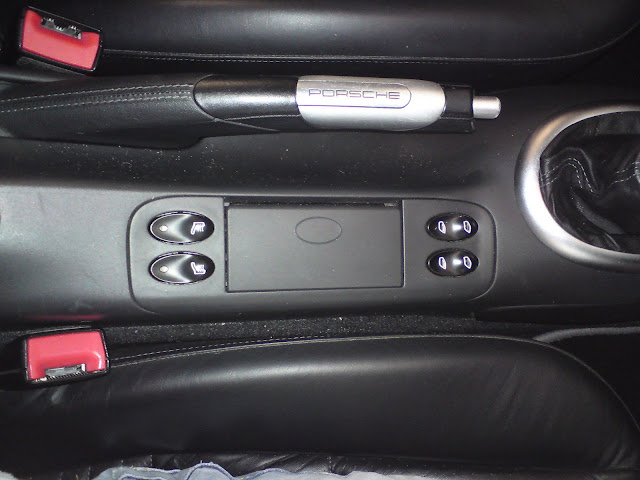
For the interior, as I mentioned I used the console delete kit. I have heated seats so I extended the wiring for the switches and moved them to the blanks behind the ashtray. All seems to be ok so far.
ETA:
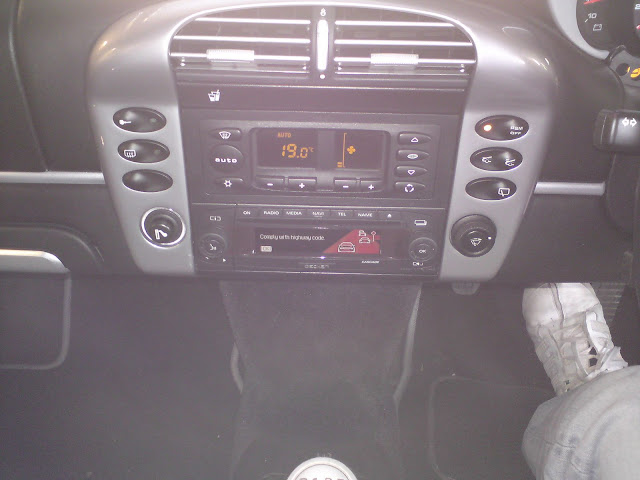
Pic of HU installed
Pic of heated seat button moved to ashtray blank


")


