Porsche 911 UK Enthusiasts Online Community Discussion Forum GB

Welcome to the @Porsche911UK website. Register a free account today to become a member! Sign up is quick and easy, then you can view, participate in topics and posts across the site that covers all things Porsche.

Already registered and looking to recovery your account, select 'login in' and then the 'forget your password' option.

996.2 PCM and lower centre console delete questions.

Slippydiff

Imola
Joined
22 Nov 2007
Messages
871
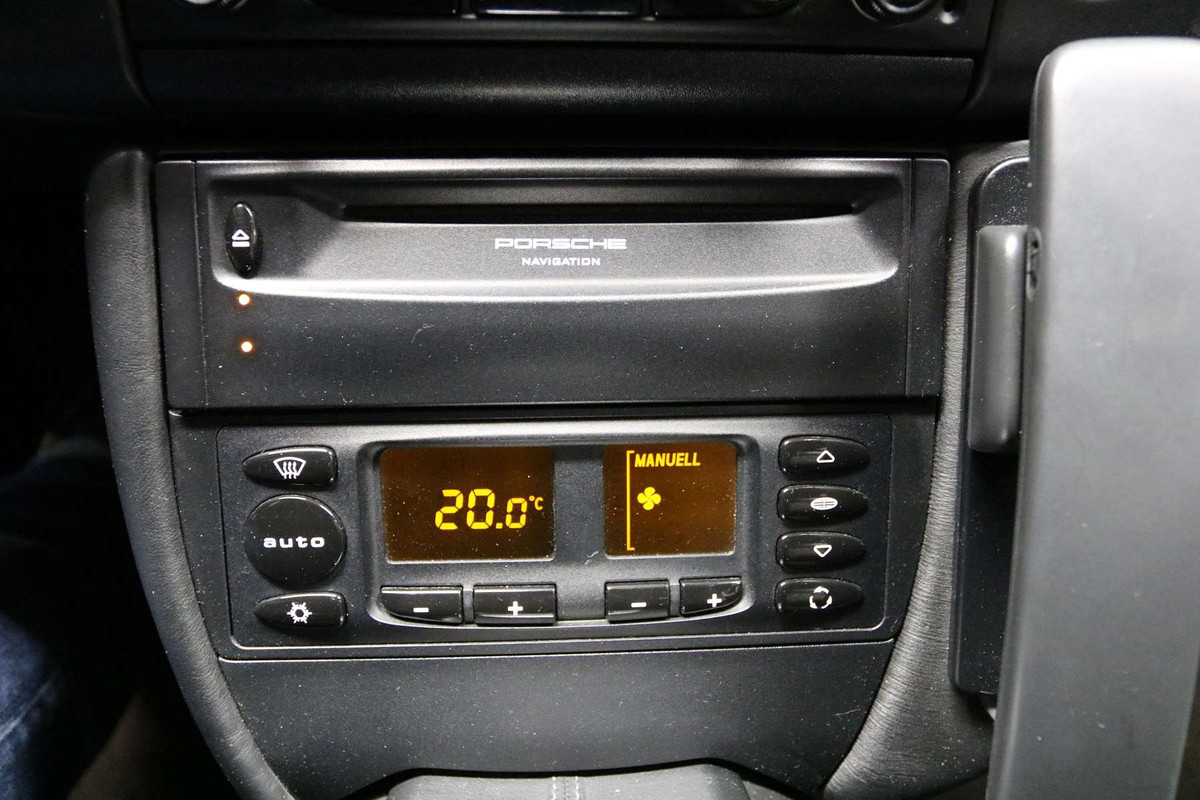
I've been asked to undertake a complete PCM and lower centre console delete on an early 996.2.

So remove this early 2000's tech fest excess/extravaganza :


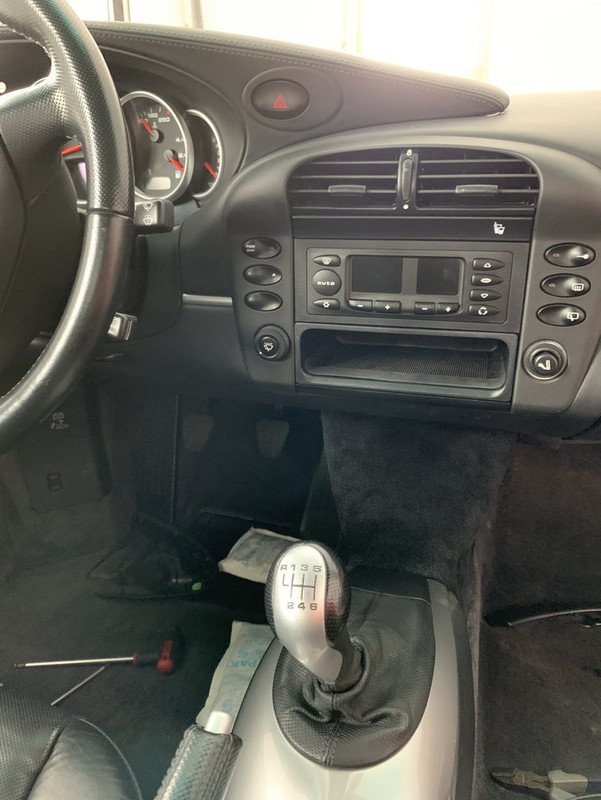
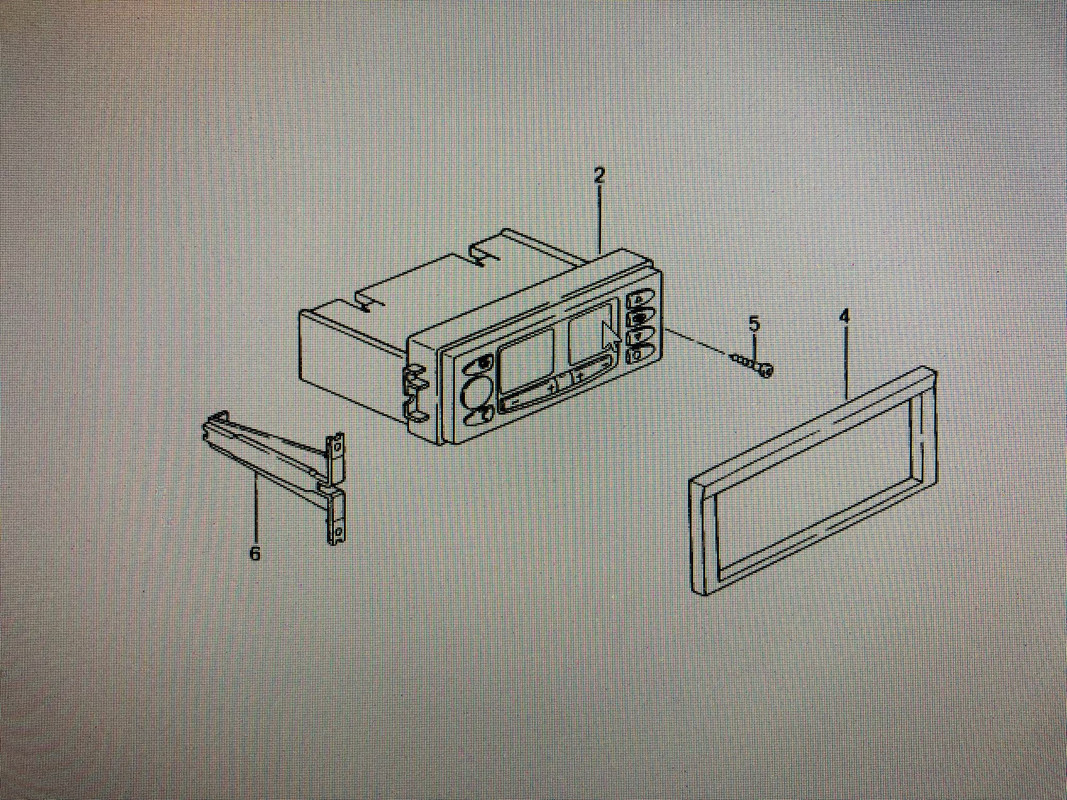
and replace it with the simplicity of this arrangement :
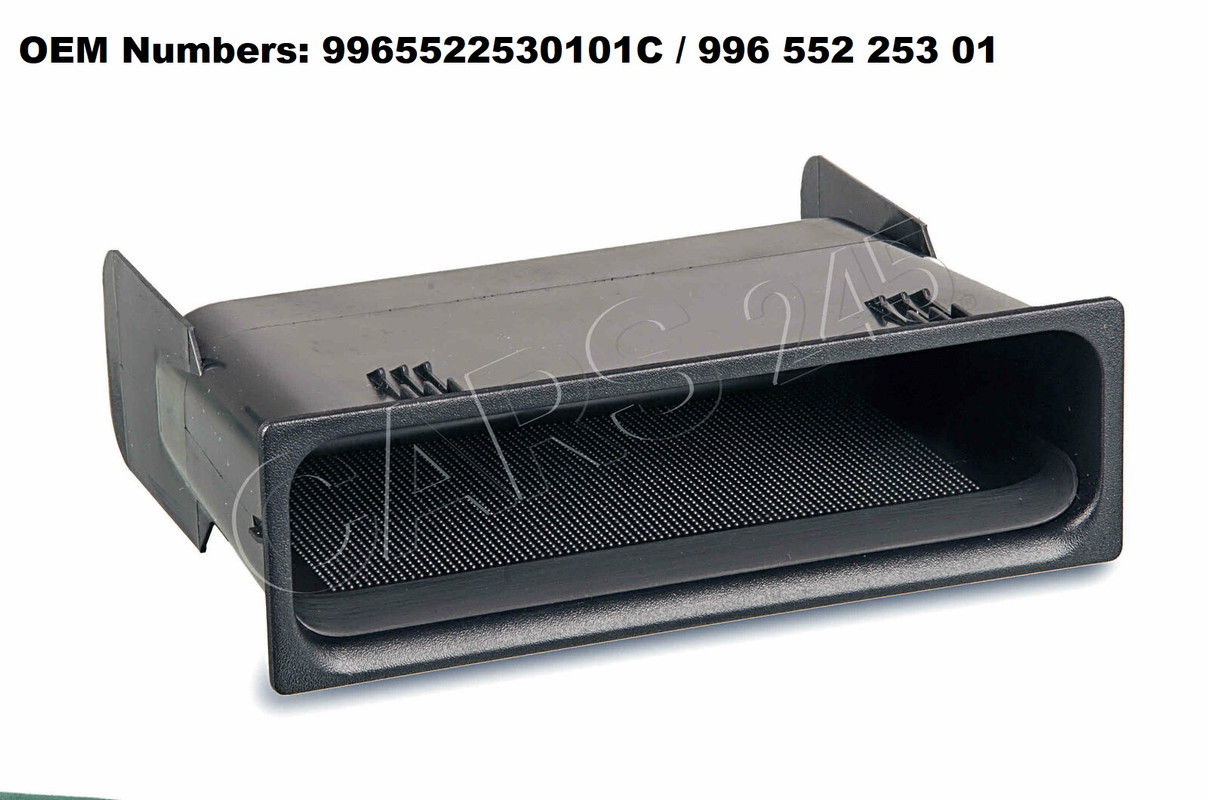
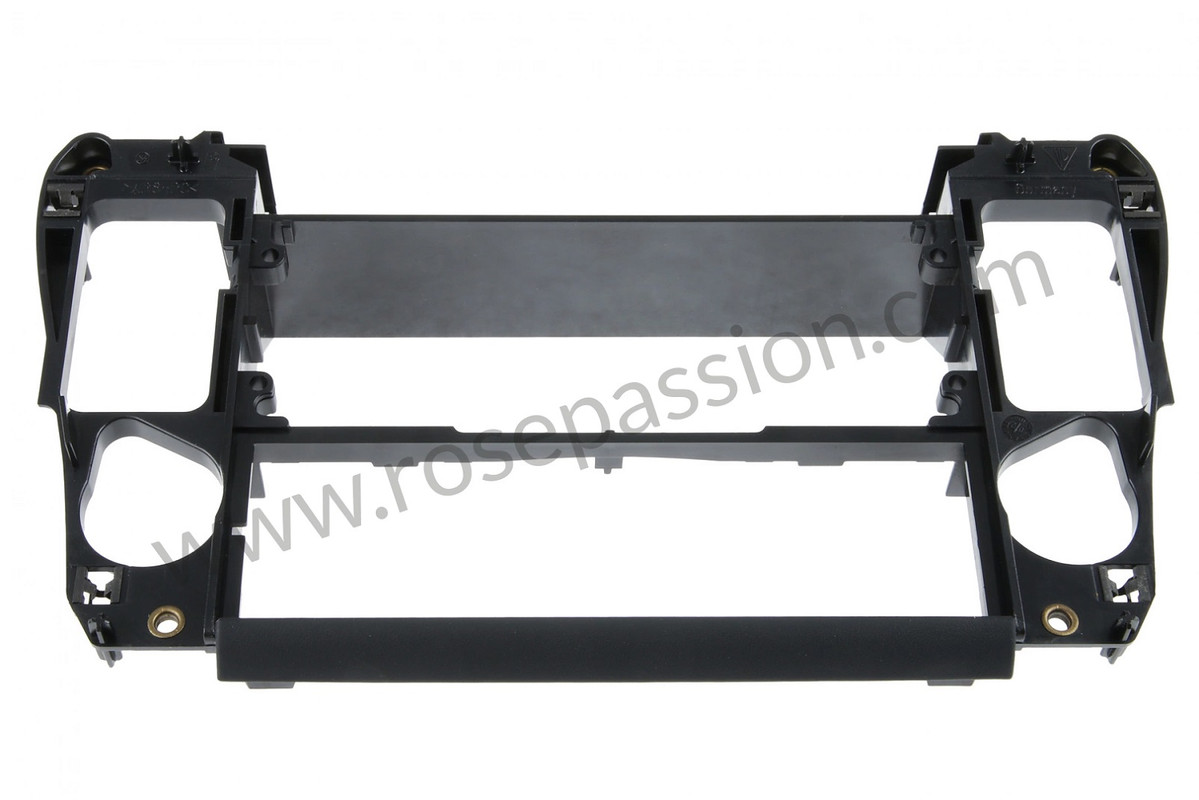


using these parts :


So to the questions ...

i. Am I right in thinking the loom for the HVAC control can be re-routed from it's position in the lower centre console, back to its "usual" position above where the radio would normally be fitted in the dash, without the need to be extended ?

ii. Does relocating the HVAC control/display unit require the use of two of these brackets to secure it in the revised dash insert/surround ?


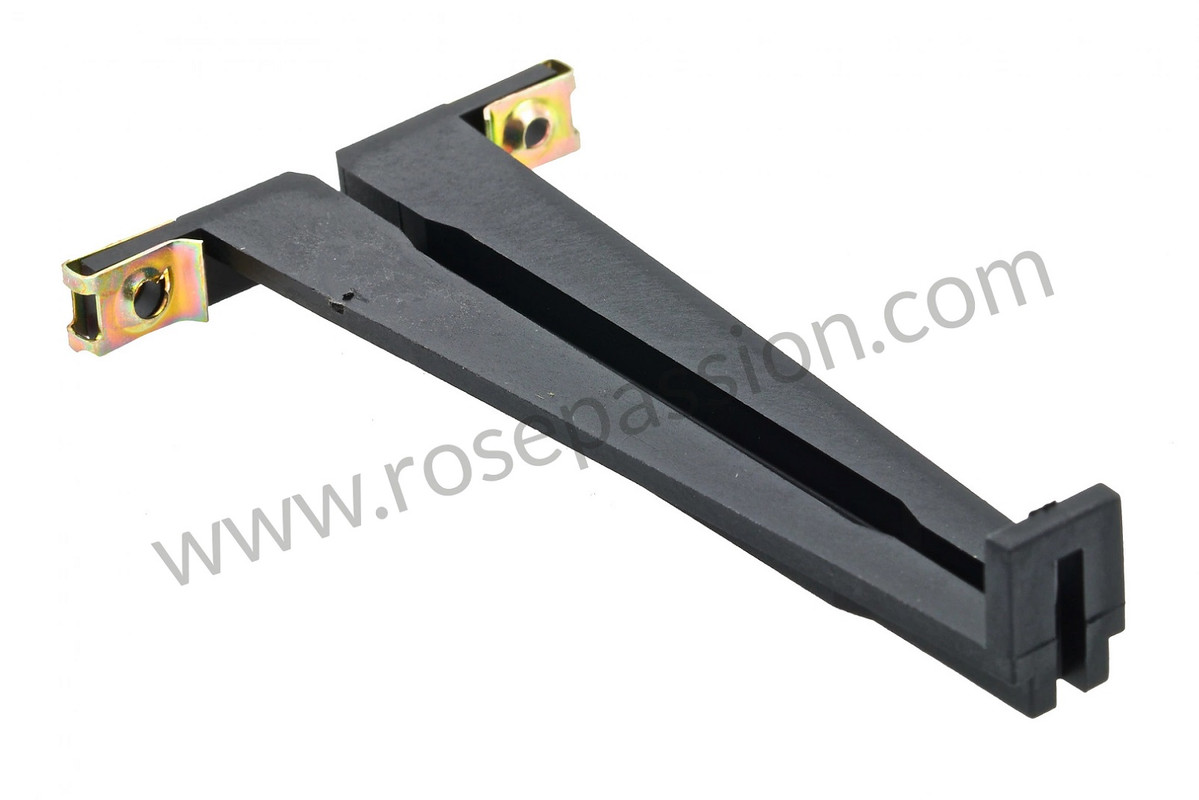
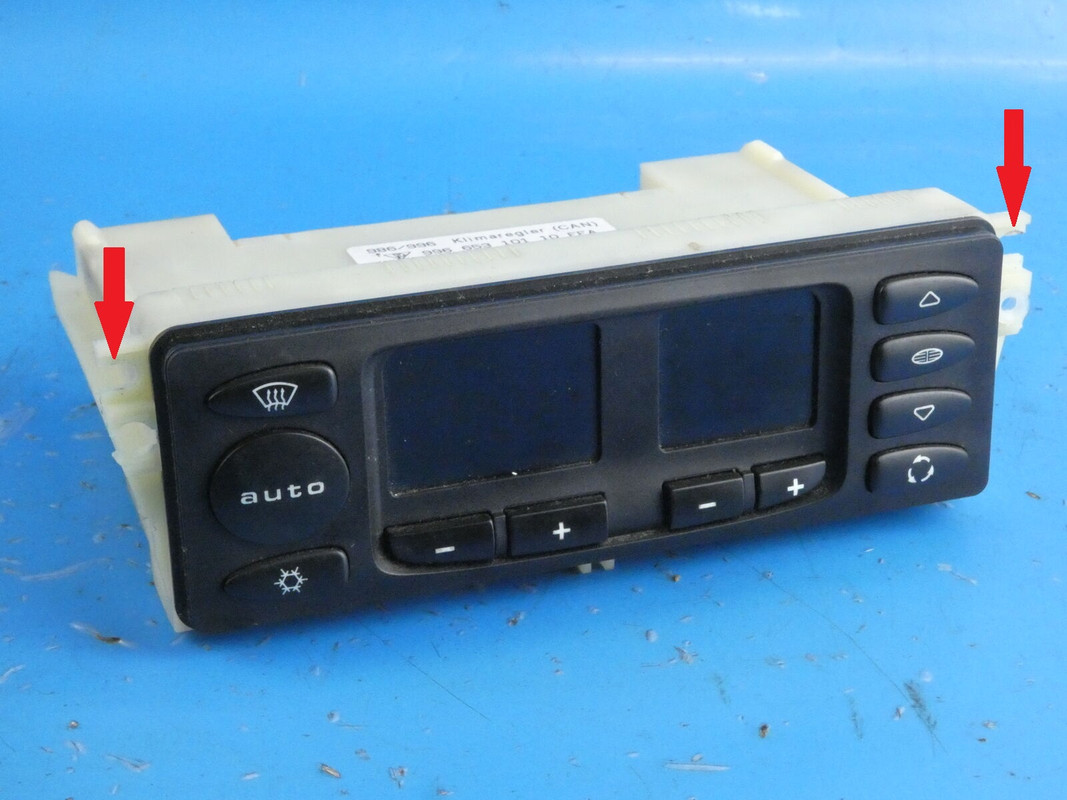
A look at the image of the revised dash insert posted above/earlier in this post, and this image of the HVAC control/display below from The Bay of E, would tend to indicate they're not needed as the unit has two lugs which the screw heads will secure when screwed into the revised dash insert/surround :


Any tips/advice on the conversion gratefully received :thumb:
 
From my personal experience with my 2003 car it's a yes to both questions :thumb:
 
So no loom extension needed, but two mounting brackets (@ £20 a piece :floor: ) will be required ?
 
Yes, from memory I'm pretty sure the two brackets secure the HVAC unit in place, I picked mine up on eBay
 
I kind of did the opposite to relocate the HVAC to the lower section a few years ago.

As I recall the loom is routed to the upper area, & could be fed down to the lower section. I suspect it will be the same for your scenario, so it should have enough length to pull it back through to the upper section.

The HVAC unit has a piece of trim surrounding it which can be prised off. Those two brackets should be accessible behind this and are required to keep the HVAC unit in place. If you have a look on YT you'll see some videos that walk you through the relocation steps & may be helpful.

Incidentally one of those pics show heated seat buttons in the batwing section while the other doesn't. If you have these, you'll obviously need to relocate them to either the horseshoe or ashtray cubby areas as well. I'm not sure if the cables would need extending though.
 
sp1ke said:
I kind of did the opposite to relocate the HVAC to the lower section a few years ago.

As I recall the loom is routed to the upper area, & could be fed down to the lower section. I suspect it will be the same for your scenario, so it should have enough length to pull it back through to the upper section.

The HVAC unit has a piece of trim surrounding it which can be prised off. Those two brackets should be accessible behind this and are required to keep the HVAC unit in place. If you have a look on YT you'll see some videos that walk you through the relocation steps & may be helpful.

Incidentally one of those pics show heated seat buttons in the batwing section while the other doesn't. If you have these, you'll obviously need to relocate them to either the horseshoe or ashtray cubby areas as well. I'm not sure if the cables would need extending though.

Many thanks for this (and the other replies) all incredibly helpful. Job completed successfully, with the exception of one of the retaining lugs on the back of the cupholder face plate snapping off ...
If Porsche had put as much effort into their IMS bearing design as they did the cupholder, the world would be a better place :mrgreen:
 
Slippydiff said:
Many thanks for this (and the other replies) all incredibly helpful. Job completed successfully, with the exception of one of the retaining lugs on the back of the cupholder face plate snapping off ...
If Porsche had put as much effort into their IMS bearing design as they did the cupholder, the world would be a better place :mrgreen:

You're welcome :)
FYI The chap who makes the "lightsavers" also does some replacement cupholder faceplate parts. See https://rennfix.com/faceplates
but might be cheaper to keep an eye out for a 2nd hand one.
 
sp1ke said:
Slippydiff said:
Many thanks for this (and the other replies) all incredibly helpful. Job completed successfully, with the exception of one of the retaining lugs on the back of the cupholder face plate snapping off ...
If Porsche had put as much effort into their IMS bearing design as they did the cupholder, the world would be a better place :mrgreen:

You're welcome :)
FYI The chap who makes the "lightsavers" also does some replacement cupholder faceplate parts. See https://rennfix.com/faceplates
but might be cheaper to keep an eye out for a 2nd hand one.

I found those a couple of nights ago... Shame the factory didn't make them out of something more durable.
Buy the time you've paid his (what would no doubt be exorbitant) shipping charges to the UK, plus any duty, it's cheaper to buy a complete unit off The bay of E ...

Now I've see Mr Lightsavers video on how to fit the faceplate, I'll try gluing it (again) ... :D
 

New Threads

Forum statistics

Threads
124,627
Messages
1,442,250
Members
49,071
Latest member
Kashmir
Back
Top