

911Time
Suzuka
- Joined
- 25 Sep 2018
- Messages
- 1,172
Hi Guys,
Since the last update, there's been a lot going on (most of it crap sadly but that's life these days). Anyway, I've been quietly working away on another bespoke project for the 991 but as always, it's taken far longer to achieve than I first expected.
As this was a long process, I'd recommend getting a cuppa/biscuit (or even better a pack) before reading on...hope you enjoy the saga. ☺
The Idea
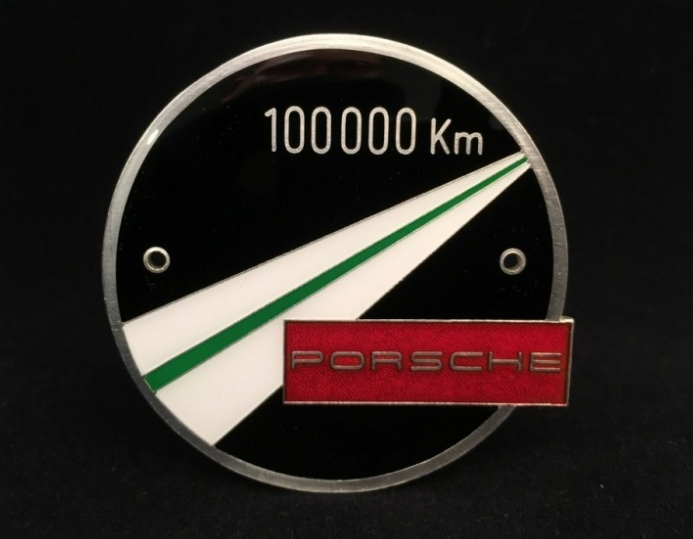
Many of you will know, that there's been a long-standing tradition of VW and Porsche owners attaching grille badges to their cars. Back in the 50's, as a mark of achievement, the VW/Porsche factories would supply a grille badge to any owner who'd covered more than 100,000kms in their car.
Early 100km grille badge:
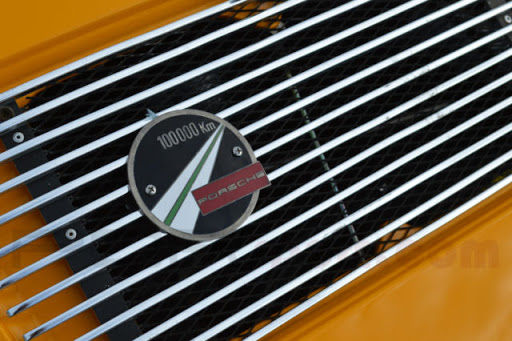
Owners clubs and the ADAC also supplied their own – a bit like our AA badges:
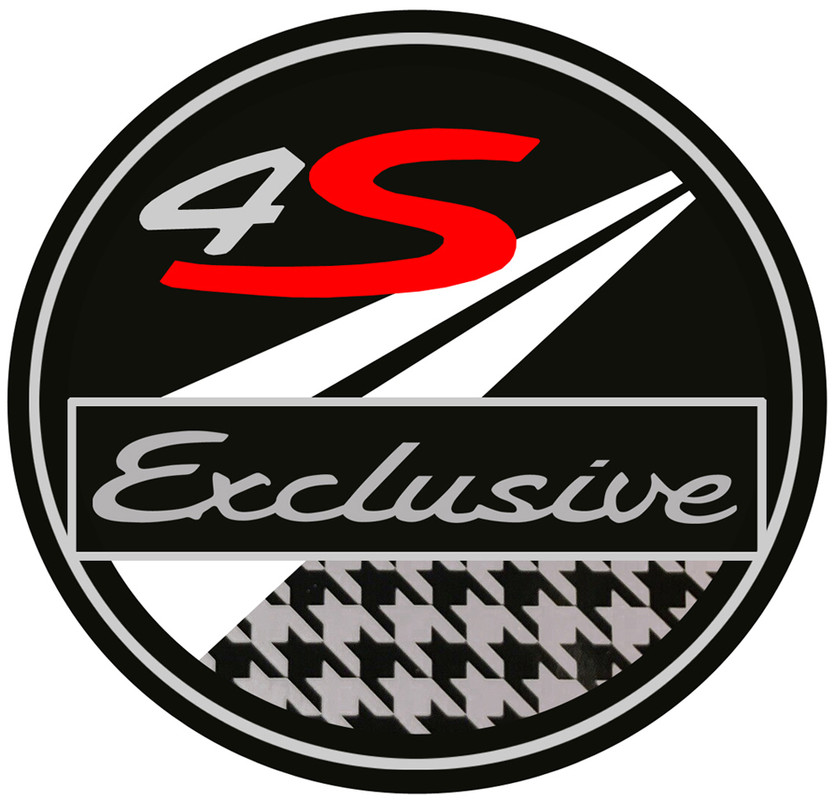
Porsche have re-visited the idea several times over the years and issued limited runs of badges, to celebrate events or cars. The latest being the badge they've created for the 992 Targa 4S Heritage edition:

I quite liked the idea of having a badge but couldn't find anything that suited, so decided instead to design & commission one myself.
Design
The basic idea took shape quite quickly but it took about a week or so to gather all the images, create vector files for the design elements and work up a basic brief: A bespoke badge for a bespoke car - one that would reflect the specific details and design elements; like the 4S wide-body (I don't have any 4S badges on the car), Exclusive options and heritage elements, like the 50th Anniversary 'Fuchs' alloys & grille, retro gauges and last but not least the Pepita fabric seats.
Specification and Manufacture
It's very important to me that any work I've done or had done on the car, has been carried out to Porsche factory standard, so the badge had to be the same. It had to meet OEM quality for both aesthetic appearance and durability – such as resistance to corrosion, UV stability, heat etc. It helps having worked in automotive manufacture, as a mech engineer but that was a long while ago – thankfully I still know some folks in the industry, who I can call upon for any specialist advice.
First of all, a die was created, with which to strike the badge:
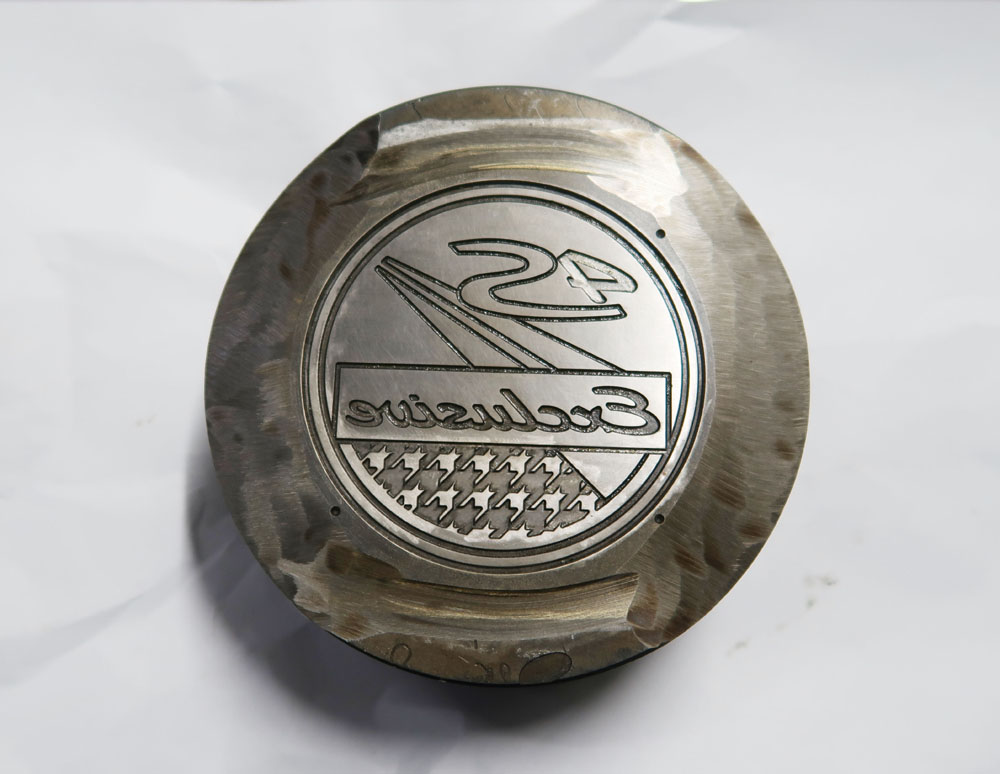
For this installation, I specced a high grade brass alloy, with finished dimensions of 80mm diameter x 4mm thick, pickled clean and then in-filled with a Pantone colour matched mixture of high gloss and matt black vitreous enamels, before finally having the exposed metal elements electroplated in an antique silver effect chrome.
There are several Tier 1 badge manufacturers in the UK but understandably, most are used to working in large volumes. Thankfully, after a lot of dead ends, I found a supportive company in Sheffield, with experience of working with specialist car makers and tuners, who agreed to my somewhat unique request.
After six weeks of anticipation, I was delighted when the badge finally arrived. Here's a picture of it, sat on the Pepita fabric – the pattern detail matched exactly:

Badge Carrier – Design & Manufacture
Creating the badge of course was only the first step, as without a suitable method of attaching it, the whole idea would be a non-starter.
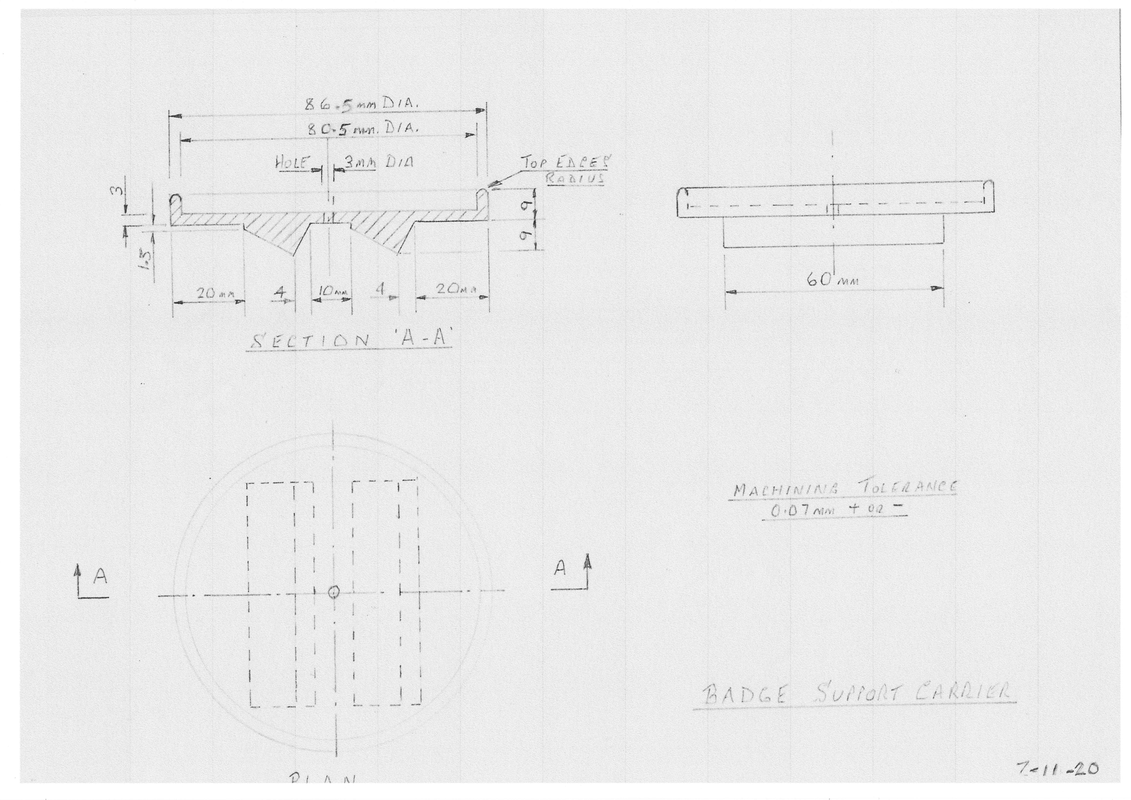
The 356 and a lot of 911s had open slat or mesh grilles, through which you could bolt a badge but my car has one of the 50th Anniversary engine grilles, which runs 23 degrees off the horizontal, with each louvre running back at apprx 1 – 1.5 degrees off that and slightly over-lapping the next louvre, when viewed perpendicular to the inclined plane of the grille. So basically, there's no way you can arrange a bolt-through and clamp type fixing.
Time for another bespoke design....
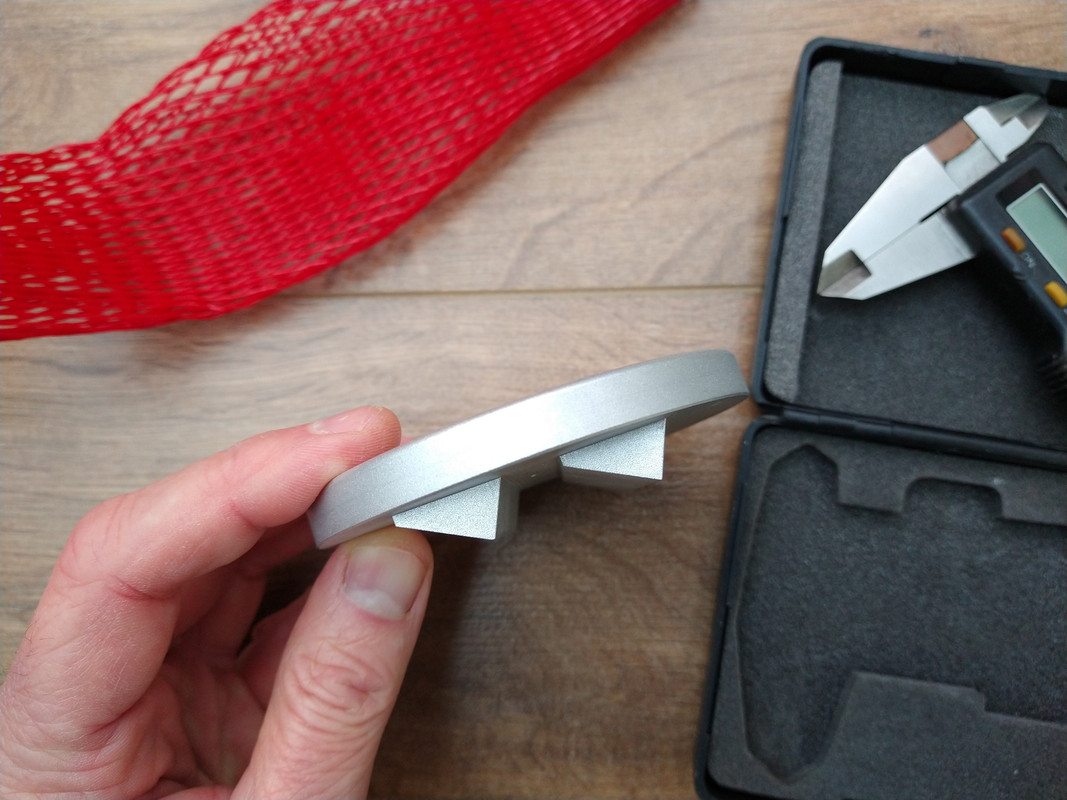
Having taking a range of measurements off the grille, I created a basic model, firstly from crafting card and then moving onto wood – which gave me a firm surface on which to test mount the badge. The rear slope of each louvre caused some headaches and there had to be several revisions to get the angle just right but the whole thing came together after a few attempts and I was able to take final measurements and create a basic drawing (I don't have any CAD software and am too old school to learn now).
Despite my old-school ways, I started to look into 3D printing, using a form of sintered Carbon Nylon and spoke with a couple of rapid prototyping companies in the F1 sphere but as you might expect, prices were a bit silly, for such a simple item.
Instead, machining seemed a more cost effective route, so I specced a 6082-T6 aluminium and fine glass bead blasting (to help with subsequent coating) and used a very helpful small-volume machining company.
Three weeks later, the carriers (I had two made) arrived in the post:
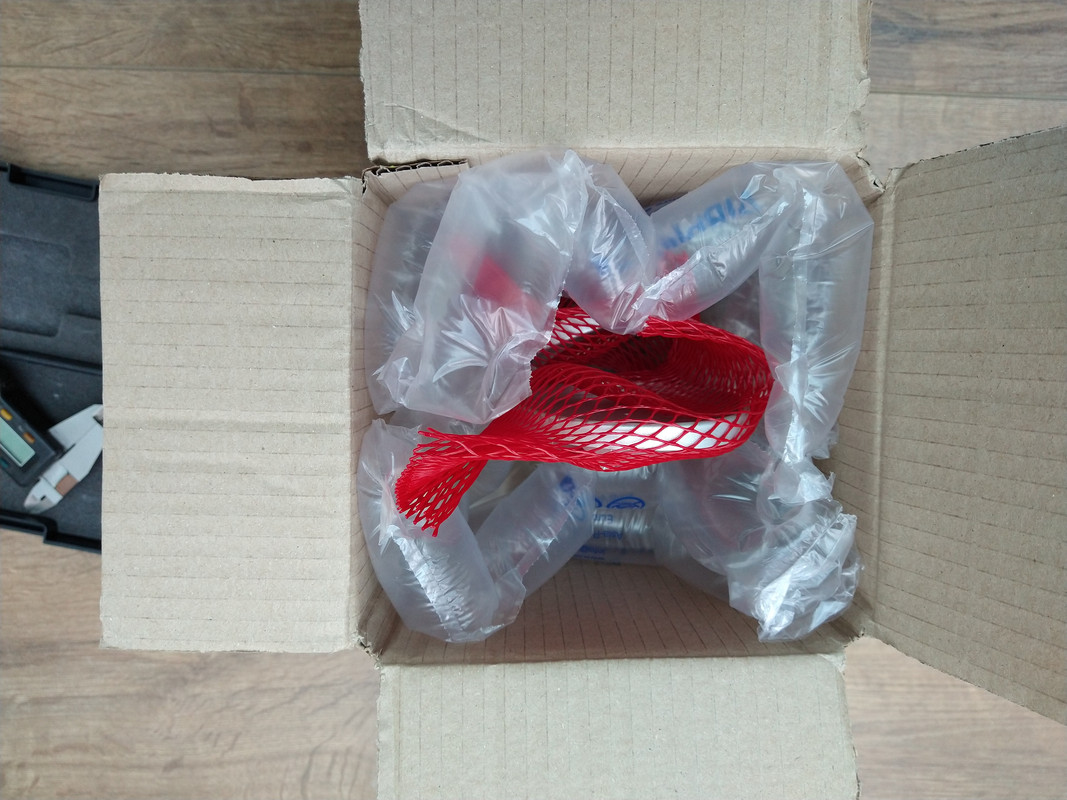
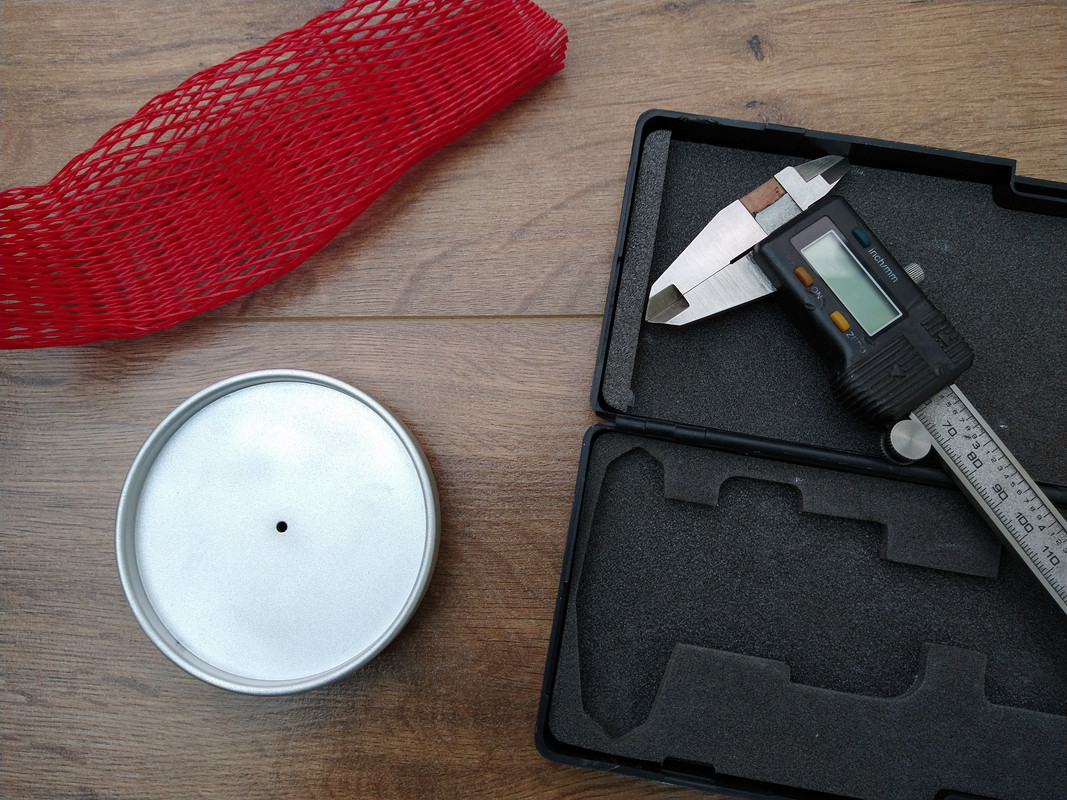
The work was excellent and all dimensions were within my tolerances.
Perfect!
Final Finishing
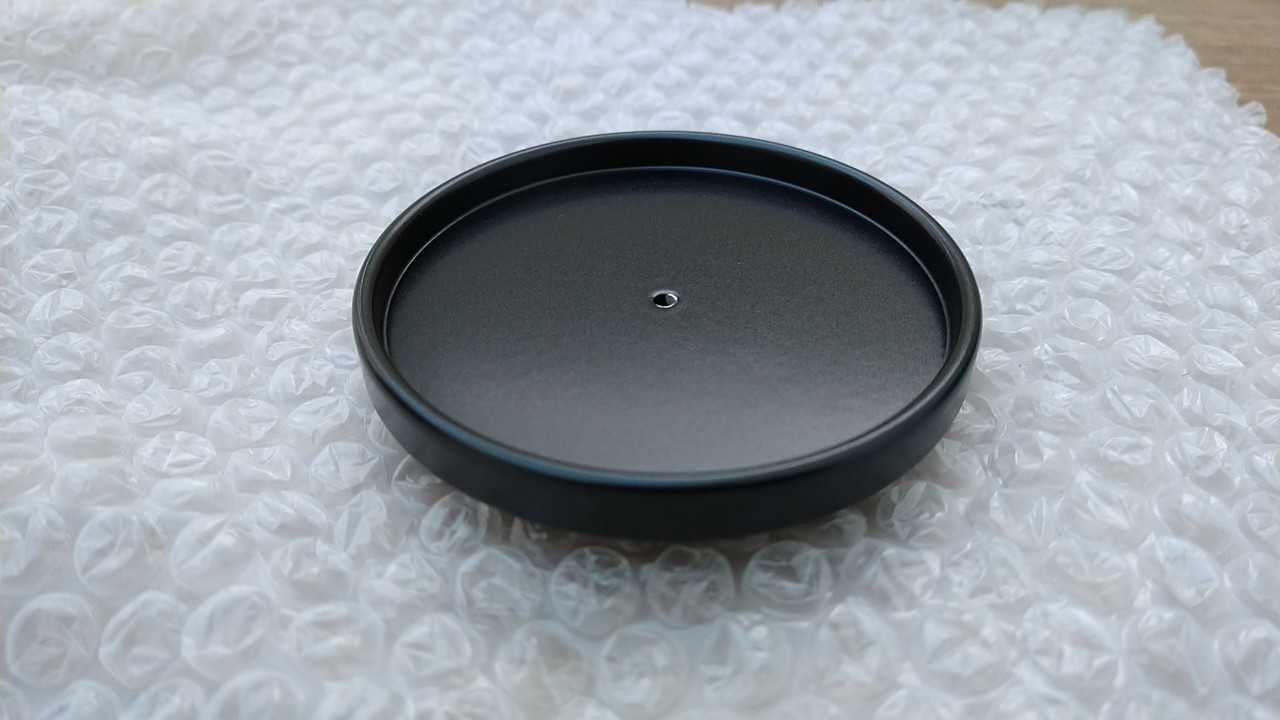
The final part of production was to apply a suitable matt black finish, to match as closely as possible to the paint finish on the Anniversary alloys, whilst again being suitable with regards to durability.
For this, I specced a 100 micron thick matt black Polyester powder coating, which was applied for me (as a favour), by a very good metal finishing company in Stoke.
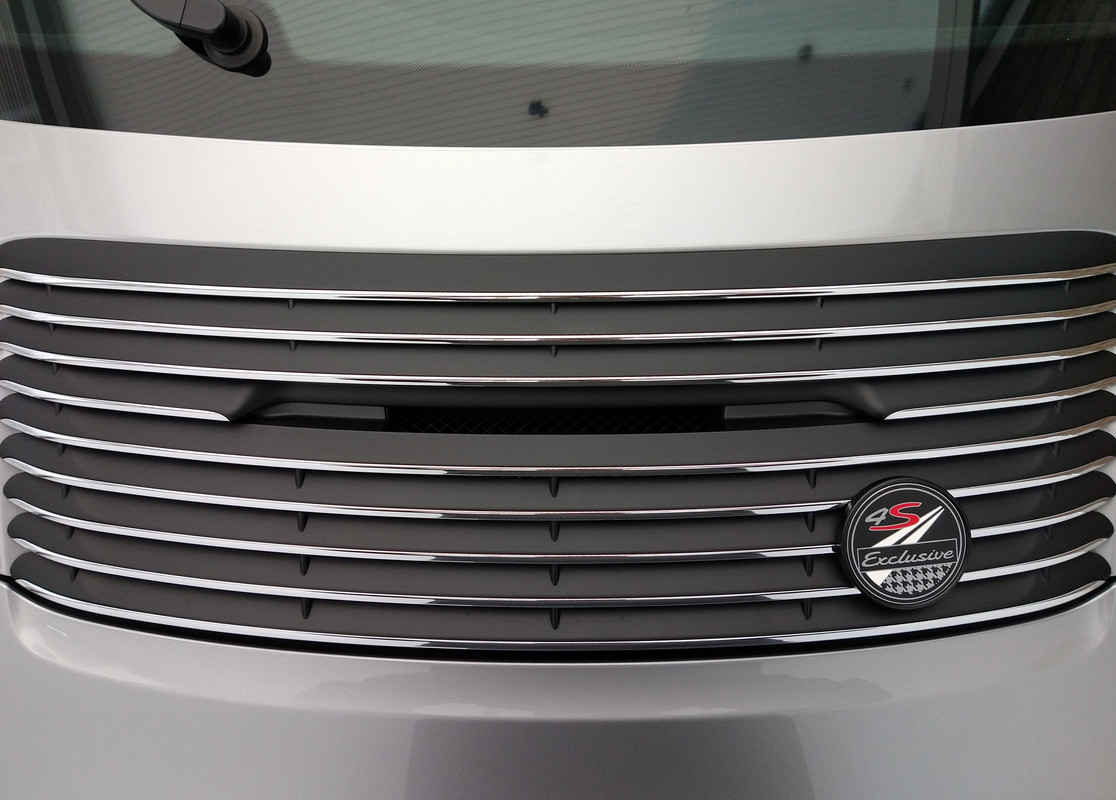
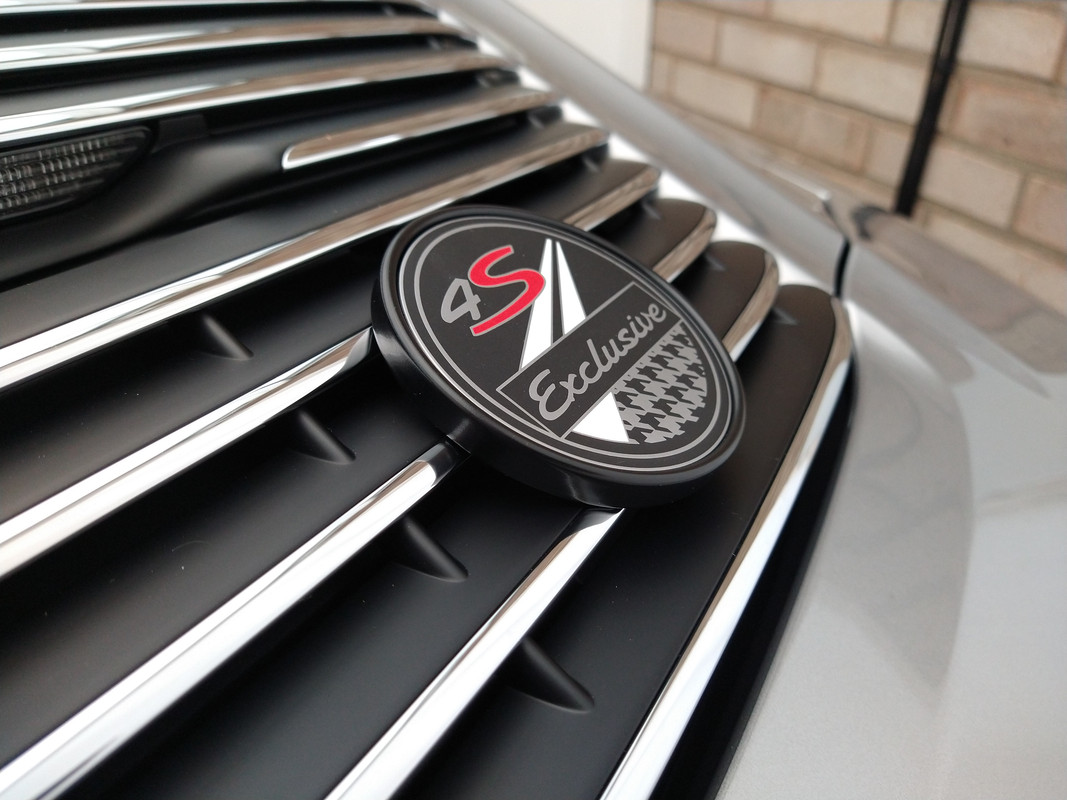
Installation
Using a heat gun to warm the area and a self-adhesive surface pyrometer to check the temperature, the badge to carrier and carrier to grille, were carefully positioned and mounted using ultra-strong, heat-resistant 3M VHB tape.
I know some people won't like it but I'm very happy with the final result and feel that it does justice to the unique nature of the car.
Thanks for reading!
Thank You
My sincere thanks to those who helped me get this project over the line and coped admirably with my finicky and OCD ways - in particular, House of Logos, SICD Engineering and Diamond Metal Finishing – thanks guys!!
Since the last update, there's been a lot going on (most of it crap sadly but that's life these days). Anyway, I've been quietly working away on another bespoke project for the 991 but as always, it's taken far longer to achieve than I first expected.
As this was a long process, I'd recommend getting a cuppa/biscuit (or even better a pack) before reading on...hope you enjoy the saga. ☺
The Idea
Many of you will know, that there's been a long-standing tradition of VW and Porsche owners attaching grille badges to their cars. Back in the 50's, as a mark of achievement, the VW/Porsche factories would supply a grille badge to any owner who'd covered more than 100,000kms in their car.
Early 100km grille badge:
Owners clubs and the ADAC also supplied their own – a bit like our AA badges:
Porsche have re-visited the idea several times over the years and issued limited runs of badges, to celebrate events or cars. The latest being the badge they've created for the 992 Targa 4S Heritage edition:
I quite liked the idea of having a badge but couldn't find anything that suited, so decided instead to design & commission one myself.
Design
The basic idea took shape quite quickly but it took about a week or so to gather all the images, create vector files for the design elements and work up a basic brief: A bespoke badge for a bespoke car - one that would reflect the specific details and design elements; like the 4S wide-body (I don't have any 4S badges on the car), Exclusive options and heritage elements, like the 50th Anniversary 'Fuchs' alloys & grille, retro gauges and last but not least the Pepita fabric seats.
Specification and Manufacture
It's very important to me that any work I've done or had done on the car, has been carried out to Porsche factory standard, so the badge had to be the same. It had to meet OEM quality for both aesthetic appearance and durability – such as resistance to corrosion, UV stability, heat etc. It helps having worked in automotive manufacture, as a mech engineer but that was a long while ago – thankfully I still know some folks in the industry, who I can call upon for any specialist advice.
First of all, a die was created, with which to strike the badge:
For this installation, I specced a high grade brass alloy, with finished dimensions of 80mm diameter x 4mm thick, pickled clean and then in-filled with a Pantone colour matched mixture of high gloss and matt black vitreous enamels, before finally having the exposed metal elements electroplated in an antique silver effect chrome.
There are several Tier 1 badge manufacturers in the UK but understandably, most are used to working in large volumes. Thankfully, after a lot of dead ends, I found a supportive company in Sheffield, with experience of working with specialist car makers and tuners, who agreed to my somewhat unique request.
After six weeks of anticipation, I was delighted when the badge finally arrived. Here's a picture of it, sat on the Pepita fabric – the pattern detail matched exactly:
Badge Carrier – Design & Manufacture
Creating the badge of course was only the first step, as without a suitable method of attaching it, the whole idea would be a non-starter.
The 356 and a lot of 911s had open slat or mesh grilles, through which you could bolt a badge but my car has one of the 50th Anniversary engine grilles, which runs 23 degrees off the horizontal, with each louvre running back at apprx 1 – 1.5 degrees off that and slightly over-lapping the next louvre, when viewed perpendicular to the inclined plane of the grille. So basically, there's no way you can arrange a bolt-through and clamp type fixing.
Time for another bespoke design....
Having taking a range of measurements off the grille, I created a basic model, firstly from crafting card and then moving onto wood – which gave me a firm surface on which to test mount the badge. The rear slope of each louvre caused some headaches and there had to be several revisions to get the angle just right but the whole thing came together after a few attempts and I was able to take final measurements and create a basic drawing (I don't have any CAD software and am too old school to learn now).
Despite my old-school ways, I started to look into 3D printing, using a form of sintered Carbon Nylon and spoke with a couple of rapid prototyping companies in the F1 sphere but as you might expect, prices were a bit silly, for such a simple item.
Instead, machining seemed a more cost effective route, so I specced a 6082-T6 aluminium and fine glass bead blasting (to help with subsequent coating) and used a very helpful small-volume machining company.
Three weeks later, the carriers (I had two made) arrived in the post:
The work was excellent and all dimensions were within my tolerances.
Perfect!
Final Finishing
The final part of production was to apply a suitable matt black finish, to match as closely as possible to the paint finish on the Anniversary alloys, whilst again being suitable with regards to durability.
For this, I specced a 100 micron thick matt black Polyester powder coating, which was applied for me (as a favour), by a very good metal finishing company in Stoke.
Installation
Using a heat gun to warm the area and a self-adhesive surface pyrometer to check the temperature, the badge to carrier and carrier to grille, were carefully positioned and mounted using ultra-strong, heat-resistant 3M VHB tape.
I know some people won't like it but I'm very happy with the final result and feel that it does justice to the unique nature of the car.
Thanks for reading!
Thank You
My sincere thanks to those who helped me get this project over the line and coped admirably with my finicky and OCD ways - in particular, House of Logos, SICD Engineering and Diamond Metal Finishing – thanks guys!!


")


