

Spent a good 5 hours today wrestling with various components and wriggling around on the floor and in the engine bay to replace the infamous starter cable :sad: Not the most difficult job but bloody awkward.
There are some good tutorials around as a guide on how to do this and I'm not going to repeat here, but thought I would post some details and pics where they skip over some to the things I found difficult!
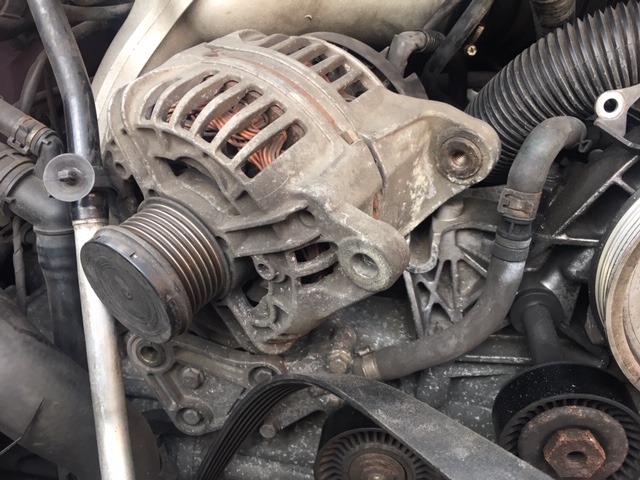
Removing the airbox, throttle body, steering fluid reservoir and auxiliary belt are easy enough. Removing the alternator was a pain! It is only fixed with two bolts, both torx, the upper one is also the mounting fro the idler pulley, easy enough to remove, a gentle tap with a hammer when it's undone a little frees it enough to wriggle clear of the mounting points. Once free you can remove the 13mm nut fixing the cable at the rear of alternator easy enough and disconnect a small wire connection. Removing the alternator completely was more difficult! I wiggled it around for ages trying to extract it, I almost gave up thinking it was just not possible! Eventually it came out, pic below give a good idea of the position you need to get the alternator in to remove it!
The AC compressor also gave me a little trouble! Two torx bolts at the front are easy enough, the one at the rear you can only feel with your fingers. One tutorial says this is a E-14 torx bolt, it is not, it is an E-12 like the other two, however I could not get my socket with extension (accessed through the intake manifold) onto the bolt head! I just about managed it with the E-14 socket! Once this bolt is completely undone, it doesn't need to be removed (it is a very long bolt) however to wiggle the compressor forward and out, I found I had reach behind and lift the bolt a little to stop it catching and digging in!
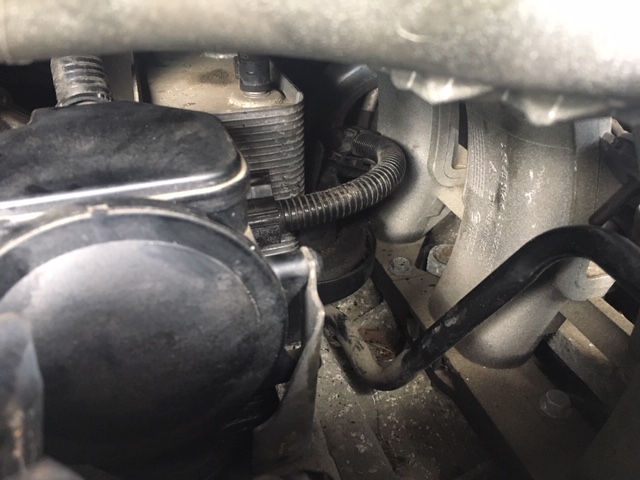
Pic below is the view of the cable once the AC pump is out of the way, routed behind the AOS before it disappears behind the engine. There are two clips holding the cable to a plastic tray, expected these to be a real pain, but I just levered the cable up from underneath with a big spanner ant they came free!
Disconnecting the cable and removing the 10mm bolts that fix it to the gearbox is awkward but relatively easy, then the cable can be pulled out from underneath, again a lot of wriggling needed! Pulling the new cable from underneath wasn't too bad at all but you need a little helper , ideally with small hands, to pull it through into the engine bay!
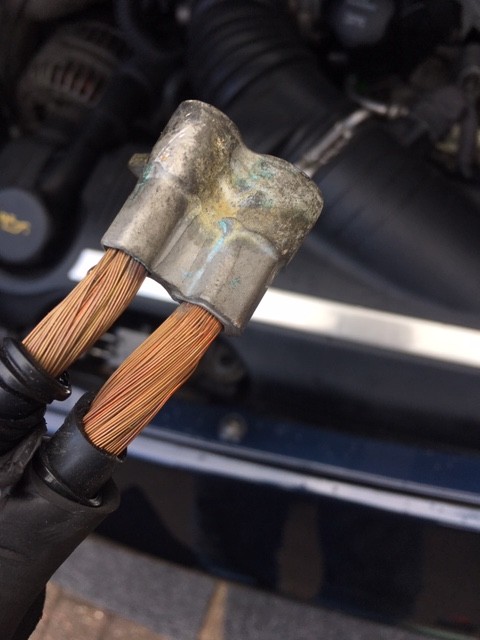
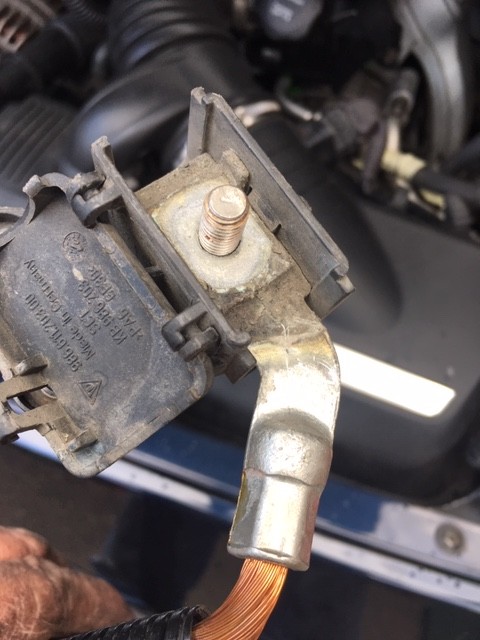
When I stripped back the insulation and inspected the old cable I wasn't too convinced it was the cause of my cold and hot start problems, but when it was all back together, starting has improved hugely, spins much faster and starts quicker from cold and hot! So very satisfied :thumb:
Pics of the old cable.

Had planned to replace the alternator, water pump and all the pulleys today too, unfortunately the parts didn't turn up from Autodoc (not too impressed with their service) :x job for next weekend :thumb:
There are some good tutorials around as a guide on how to do this and I'm not going to repeat here, but thought I would post some details and pics where they skip over some to the things I found difficult!
Removing the airbox, throttle body, steering fluid reservoir and auxiliary belt are easy enough. Removing the alternator was a pain! It is only fixed with two bolts, both torx, the upper one is also the mounting fro the idler pulley, easy enough to remove, a gentle tap with a hammer when it's undone a little frees it enough to wriggle clear of the mounting points. Once free you can remove the 13mm nut fixing the cable at the rear of alternator easy enough and disconnect a small wire connection. Removing the alternator completely was more difficult! I wiggled it around for ages trying to extract it, I almost gave up thinking it was just not possible! Eventually it came out, pic below give a good idea of the position you need to get the alternator in to remove it!
The AC compressor also gave me a little trouble! Two torx bolts at the front are easy enough, the one at the rear you can only feel with your fingers. One tutorial says this is a E-14 torx bolt, it is not, it is an E-12 like the other two, however I could not get my socket with extension (accessed through the intake manifold) onto the bolt head! I just about managed it with the E-14 socket! Once this bolt is completely undone, it doesn't need to be removed (it is a very long bolt) however to wiggle the compressor forward and out, I found I had reach behind and lift the bolt a little to stop it catching and digging in!
Pic below is the view of the cable once the AC pump is out of the way, routed behind the AOS before it disappears behind the engine. There are two clips holding the cable to a plastic tray, expected these to be a real pain, but I just levered the cable up from underneath with a big spanner ant they came free!
Disconnecting the cable and removing the 10mm bolts that fix it to the gearbox is awkward but relatively easy, then the cable can be pulled out from underneath, again a lot of wriggling needed! Pulling the new cable from underneath wasn't too bad at all but you need a little helper , ideally with small hands, to pull it through into the engine bay!
When I stripped back the insulation and inspected the old cable I wasn't too convinced it was the cause of my cold and hot start problems, but when it was all back together, starting has improved hugely, spins much faster and starts quicker from cold and hot! So very satisfied :thumb:
Pics of the old cable.
Had planned to replace the alternator, water pump and all the pulleys today too, unfortunately the parts didn't turn up from Autodoc (not too impressed with their service) :x job for next weekend :thumb:


")


